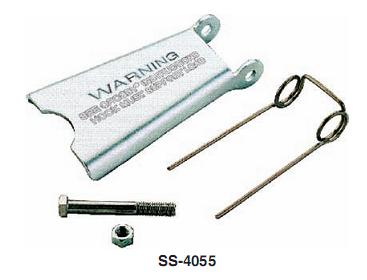
Hook Latch Kit SS-4055
Important Safety Information -Read and Follow
-
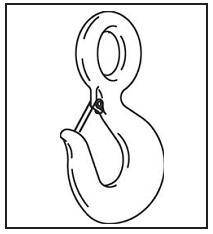
Always inspect hook and latch before using.
-
Never use a latch that is distorted or bent.
-
Always make sure spring will force the latch against the tip of the hook.
-
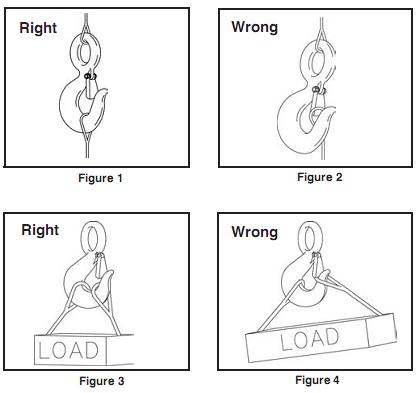
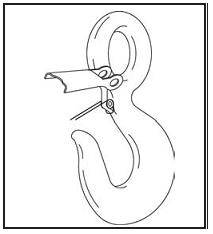
Always make sure hook supports the load. The latch must never support the load. (See Figure 1 & 2.)
-
When placing two (2) sling legs in hook, make sure the angle between legs is small enough and the legs are not tilted so that nothing bears against the bottom of the latch. (See Figure 3 & 4.)
-
Latches are intended to retain loose sling or devices under slack conditions.
-
Latches are not intended to be an anti-fouling device.
WARNING |
-
Loads may disengage from hook if proper procedures are not followed.
-
A falling load may cause serious injury or death.
-
See OSHA Rule 1926.550(g)(4)(iv)(B). A hook and this style latch must not be used for lifting personnel.
-
Hook must always support the load. The load must never be supported by the latch.
-
Read and understand these instructions before using hook and latch.
|
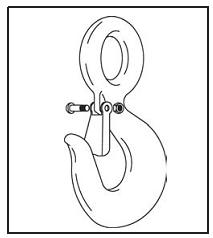
IMPORTANT - Instructions for Assembling SS-4055 Latch on Crosby Hooks
Step 1
1. Place hook at approximately a 45 degree angle with the cam up.
Step 2
2. Position coils of spring over cam with tines of spring pointing toward point of hook and loop of spring positioned down and lying against the hook.
Step 3
3. Position latch over tines of spring with ears partially over hook cam. Swing latch to one side of hook, point and depress latch and spring until latch clears point of hook.
Steps 4, 5, & 6
4. Line up holes in latch with hook cam.
5. Insert bolt through latch, spring, and cam.
6. Tighten self-locking nut on one end of bolt.
|